Wednesday, September 11, 2013

PRINTING

Here is a screen shot of the printer control pannel..

Notice the paper size (letter), and "scale to fit" is turned off....


Tuesday, September 10, 2013

Some good examples for the book

Here are some student designs to give you some ideas...


Here is a design made with patterns applied to everything
A Design made with letters only
 Here is a design made of lines....
 And a design using gradients, and fills only... no outlines.

Friday, September 6, 2013

Thursday, September 5, 2013

Monday, September 2, 2013

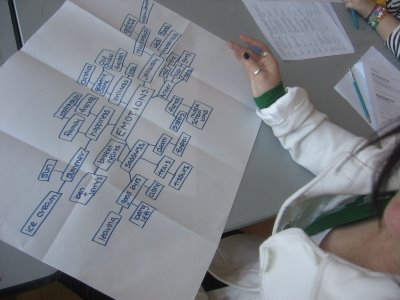
Brainstorming your THEME

We need an overall "big idea" for our book of designs..... something to link the images together....

First

A THEME is something untouchable.... a "big idea". Because it is abstract, you can create many images that connect back to it....

BRAINSTORMING is a way to gather ideas about a theme as quickly as they pop into your imagination.... one idea creates another.... by writing them down, you gather ingredients to use in creating your images.

Here are some examples of THEMES
 (These images are from this wonderful teacher's site @http://teachingasart.blogspot.com/search/label/brainstorming )


Friday, May 31, 2013

FINAL PROJECT!!!

Here are some links for ideas for the Design 1 final project....

http://blogof.francescomugnai.com/2009/10/40-creative-examples-of-self-promotion/

http://designspiration.net/tag/self%20promotion/

http://pinterest.com/sarahgehman4/self-promotion/


And some other ideas:

pop up cards are cool....
work the shape of the object too...

make it a game...

This is creative and unique...

Work off some existing object....


nice element of surprise....


simple but great bold use of VALUES...

Tuesday, May 21, 2013

Frankenstein Sample

Here are some new tools to use in your "Creature" project...

Making Masks

You can make a mask from any active selection....

Here's the original image...
Let's take out the background...


THis is a good job for the "Quick select tool".... it picks up on the CONTRAST between background and the smoke...


Make a selection by click and drag over the smoke....
THink of PUSHING the selection into place with the tool..


Use the REFINE EDGE to improve the selection....


This is better...notice the slider for CONTRAST is moved...


Now I can convert the selection to a LAYER MASK...


The Mask hides the pixels, then I can paint on the mask to fine tune it if needed...


Choose the brush tool here...


Choose the size and blur of the brush with the control pannel..... or right click for it too!


Choose black or white to paint... Black HIDES and white REVEALS the pixels..


 Be sure to have the mask selected- see the FRAME?